Configure OAuth 2.0 Connection for Jira Data Center (DC)
About
You use OAuth 2 authentication when connecting to the Jira Server / Data Center (DC). The authentication type OAuth 2.0 is not supported for Jira Cloud and RabbitMQ deployment.
In Jira, external OAuth 2 Client ID and Client secret are represented by application links.
The following topics provide a step-by-step process to configure the OAuth2 Connection:
Note
| With the release 8.1.0, RabbitMQ deployment in OAuth 2.0 integration will be supported. This allows you to integrate RabbitMQ seamlessly with OAuth 2.0 for enhanced system security and authentication. |
| Jira Proxy option provides the necessary information for the Proxy connection. Select yes to enable the box and enter the original URL. |
Requirements
The procedure described below requires you to connect to Jira at some step.
1. Configure an application link in the Jira Server Data Center
You configure an application link to an External application using OAuth2.
In Jira, go to ⚙>Application> Application links (under Integrations):
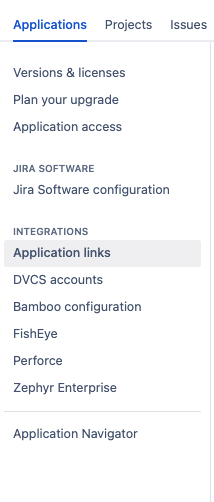
2. Click the Create New link.
3. Select External application.
4. Under External application, select Direction Incoming.
5. Click Continue in the subsequent confirmation dialog.
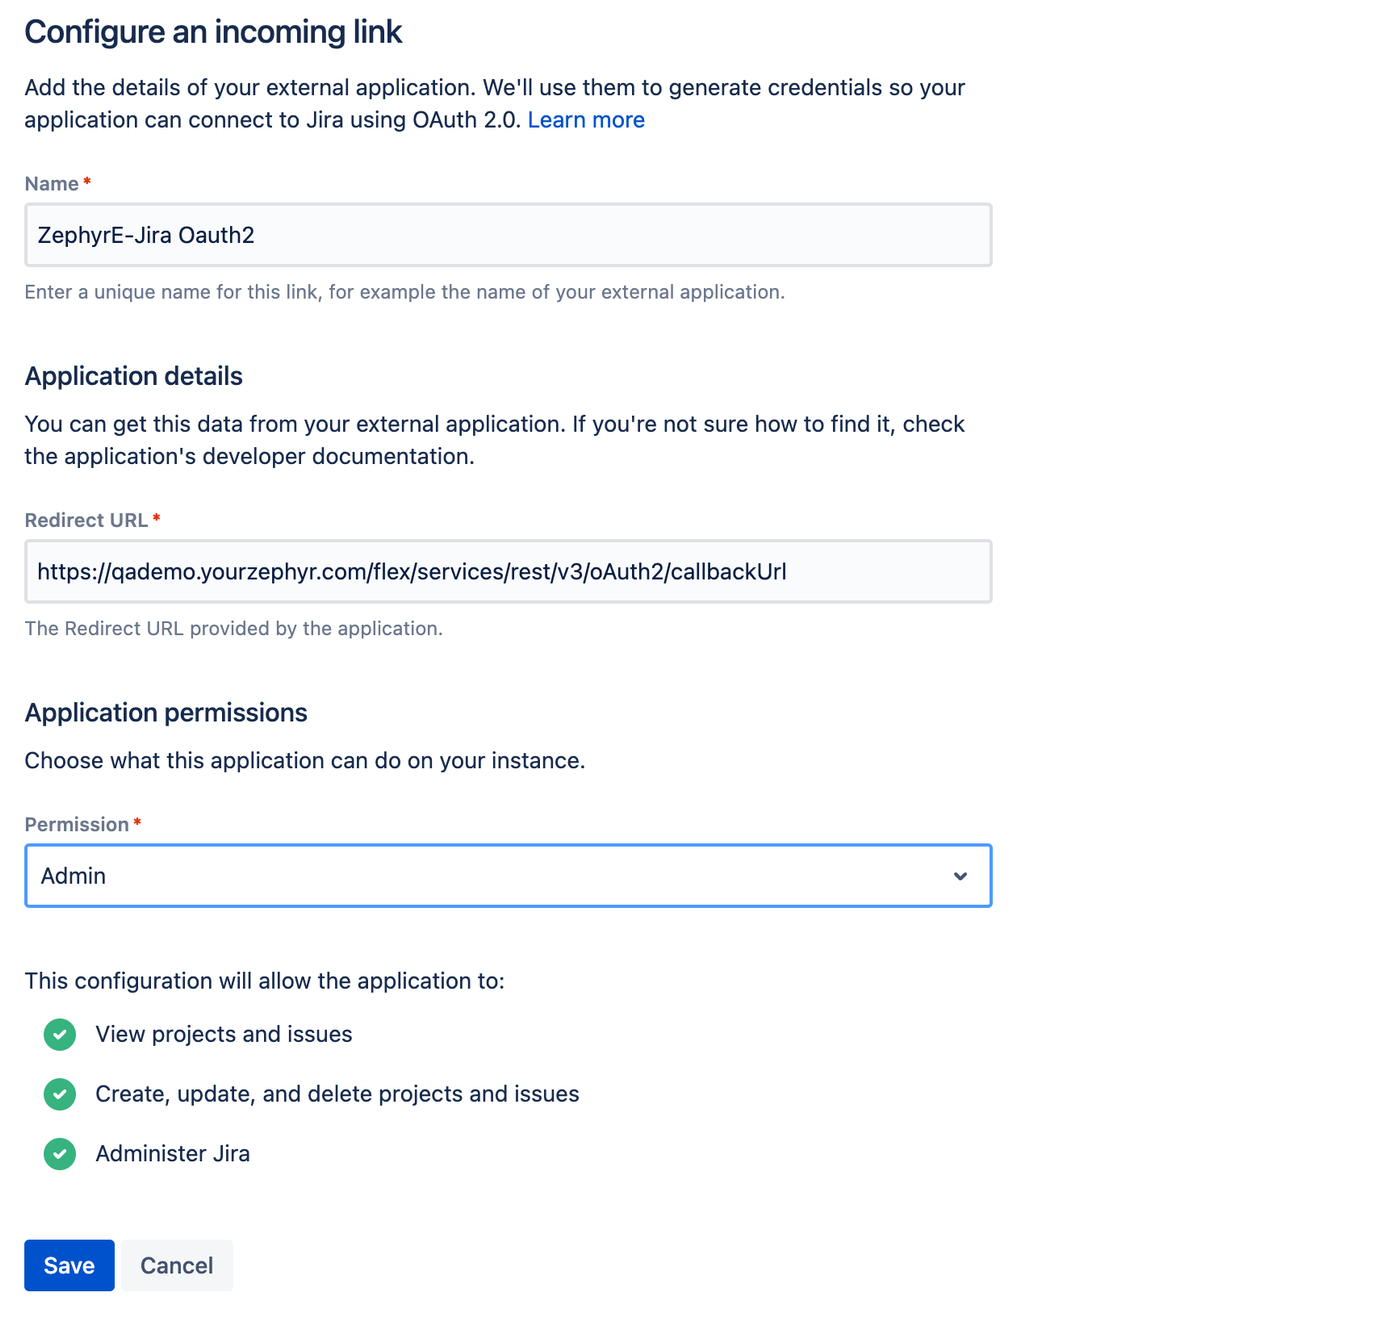
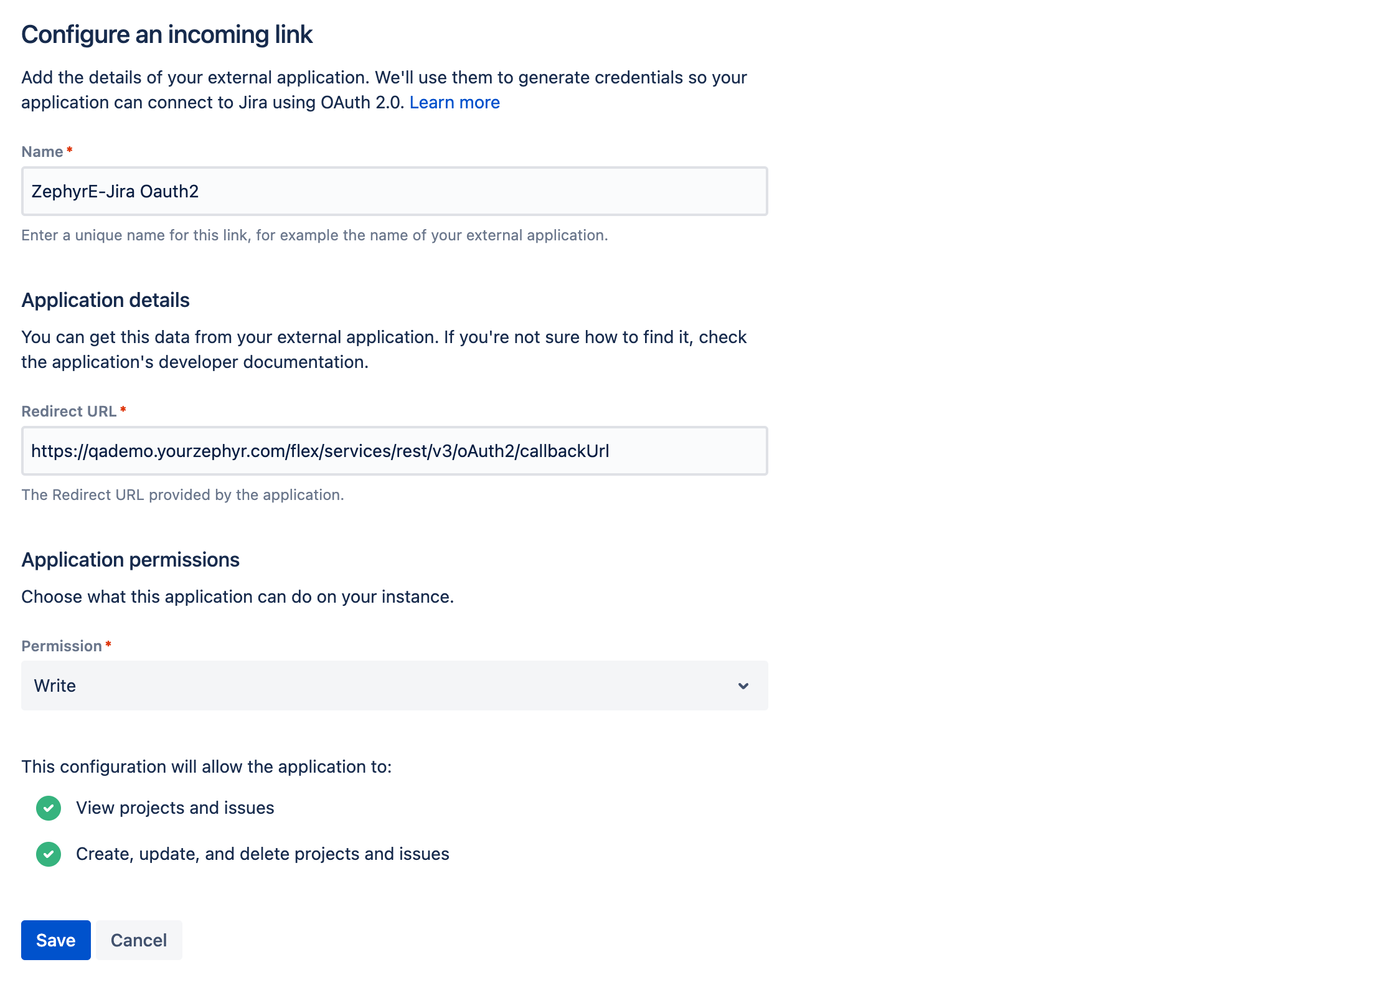
6. Now you need to configure the link properties:
Name*: Enter some name into the Name box, for example, Zephyr Ent.
Redirect URL* : Enter the URL into the Redirect URL* URL should be in the format of https://{ZephyrHostName}/flex/services/rest/v3/oAuth2/callbackUrl
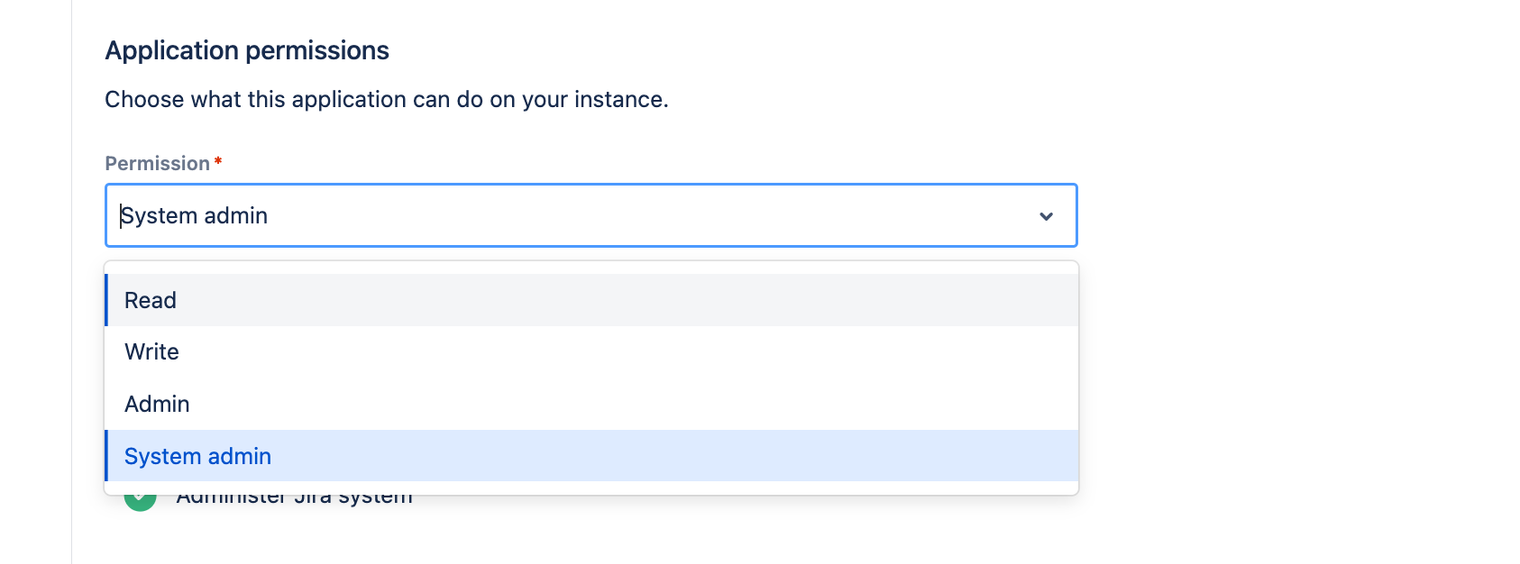
Permission*: The procedure described below requires you to connect to Jira at some step.
7. Credentials
After saving, you will get the credentials of the OAUTH2 that will be used in integration with Zephyr Enterprise.
Client ID
Client Secret
2. Configure the connection in Zephyr
1. Log in to your Zephyr Enterprise instance as a user with administrator permissions.
2. Go to Administration > Jira Integration (under System Setup).
3. Click + above the Jira instance list.
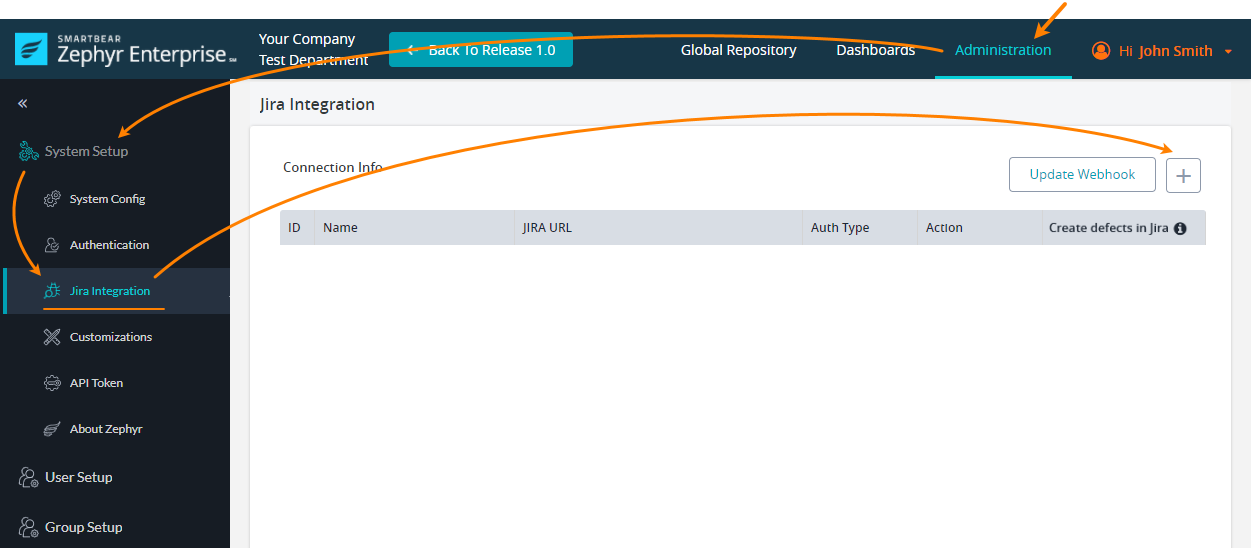
4. In the subsequent dialog, specify the following values:
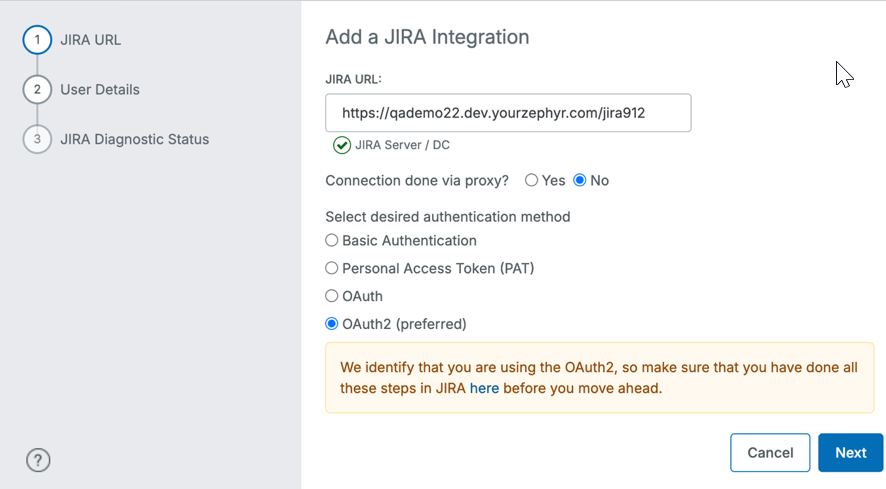
Jira URL – The URL of your Jira instance, like
https://{my-org}.example.comJiraa.Select "Yes" or "No" to connect via a proxy based on your network configuration.
In the Jira Base URL box, enter the URL.
Select the desired authentication method. OAuth2 (preferred)
5. Click Next to proceed to enter the following required user details:
Name: - Enter the unique name for this Jira
Client ID: - Client ID from the above step from the Jira Application link configuration
Client Secret: - Client Secret from the above step from the Jira Application link configuration
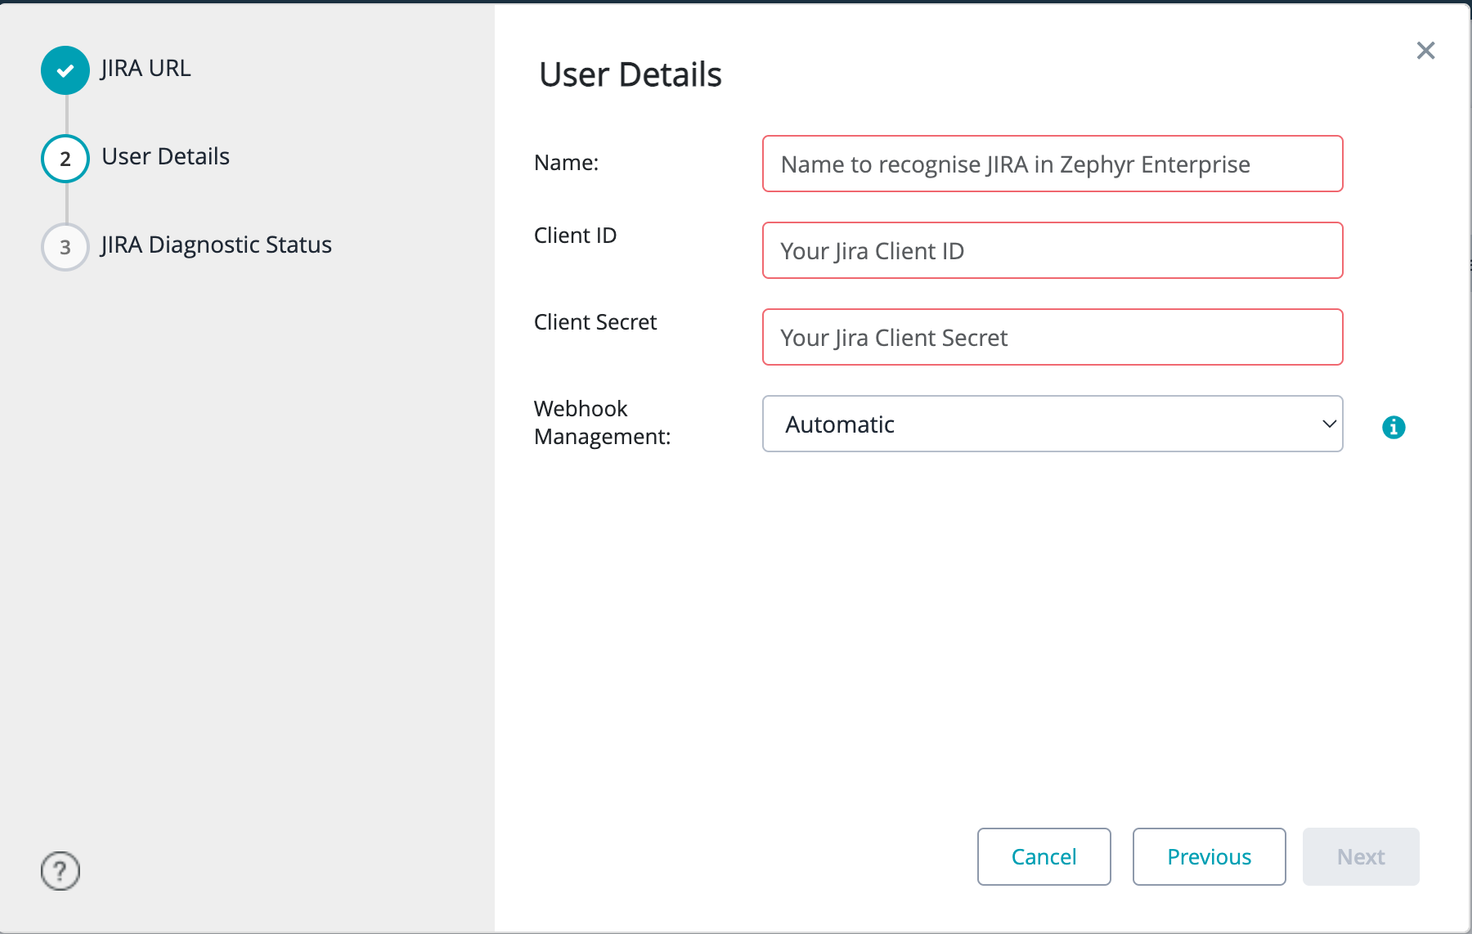
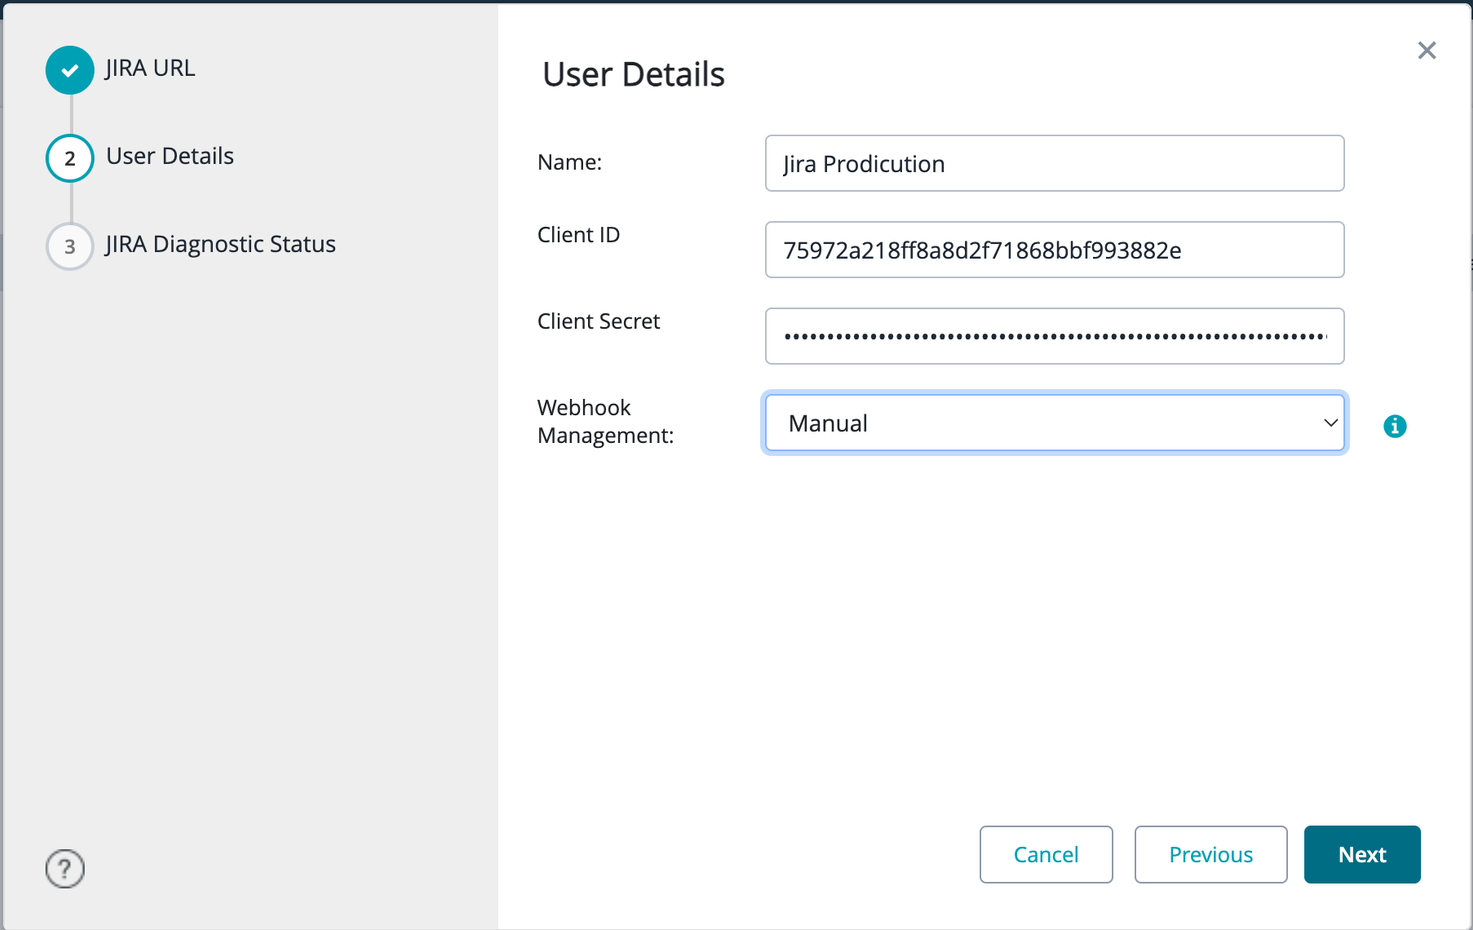
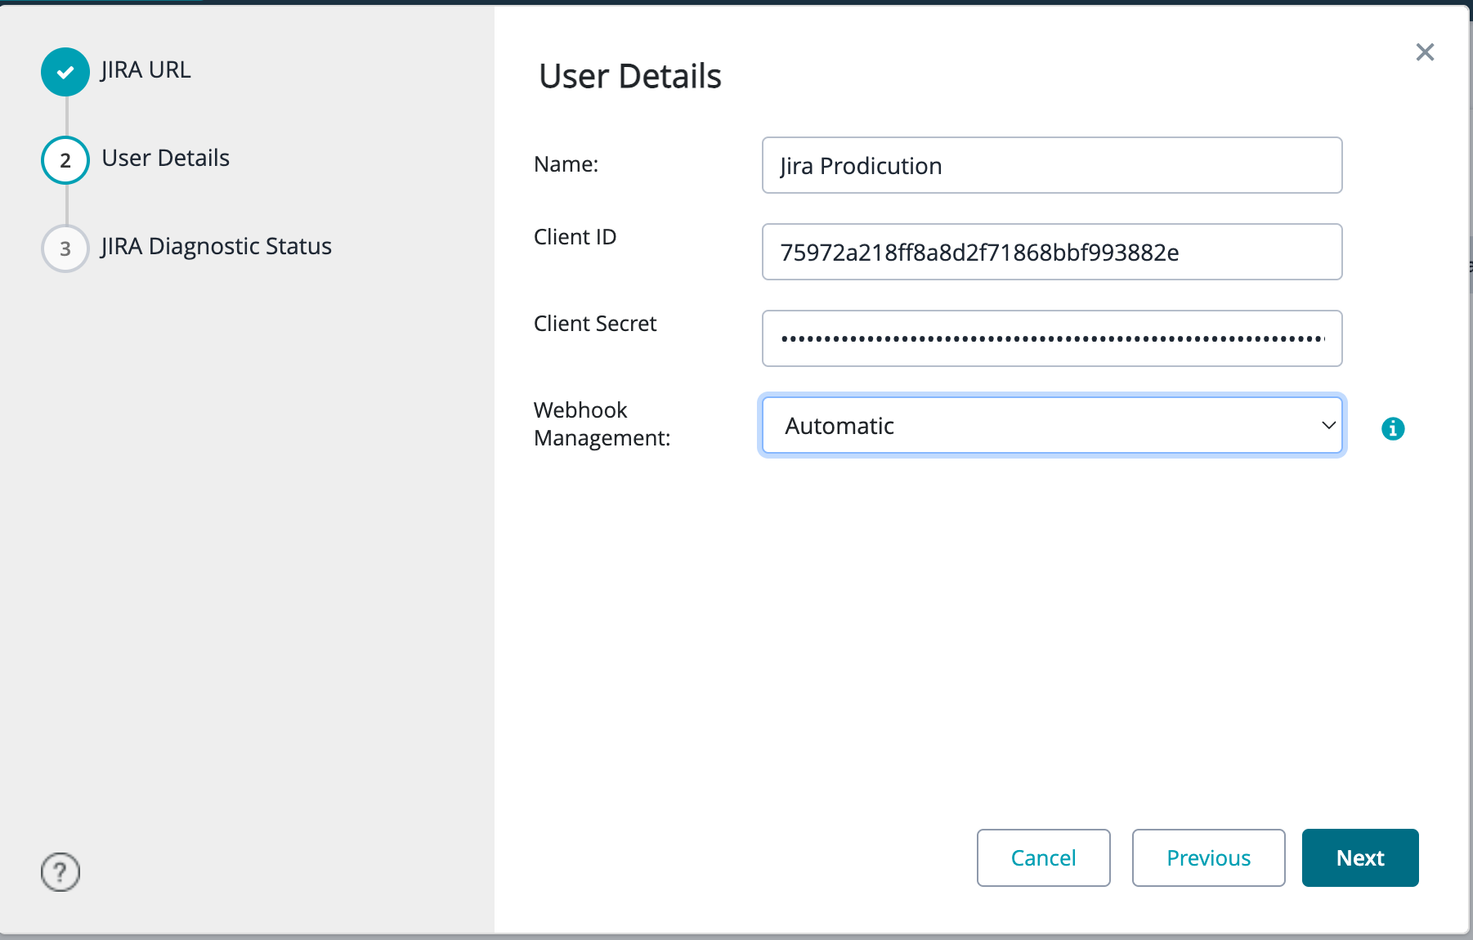
6. Click Next to continue.
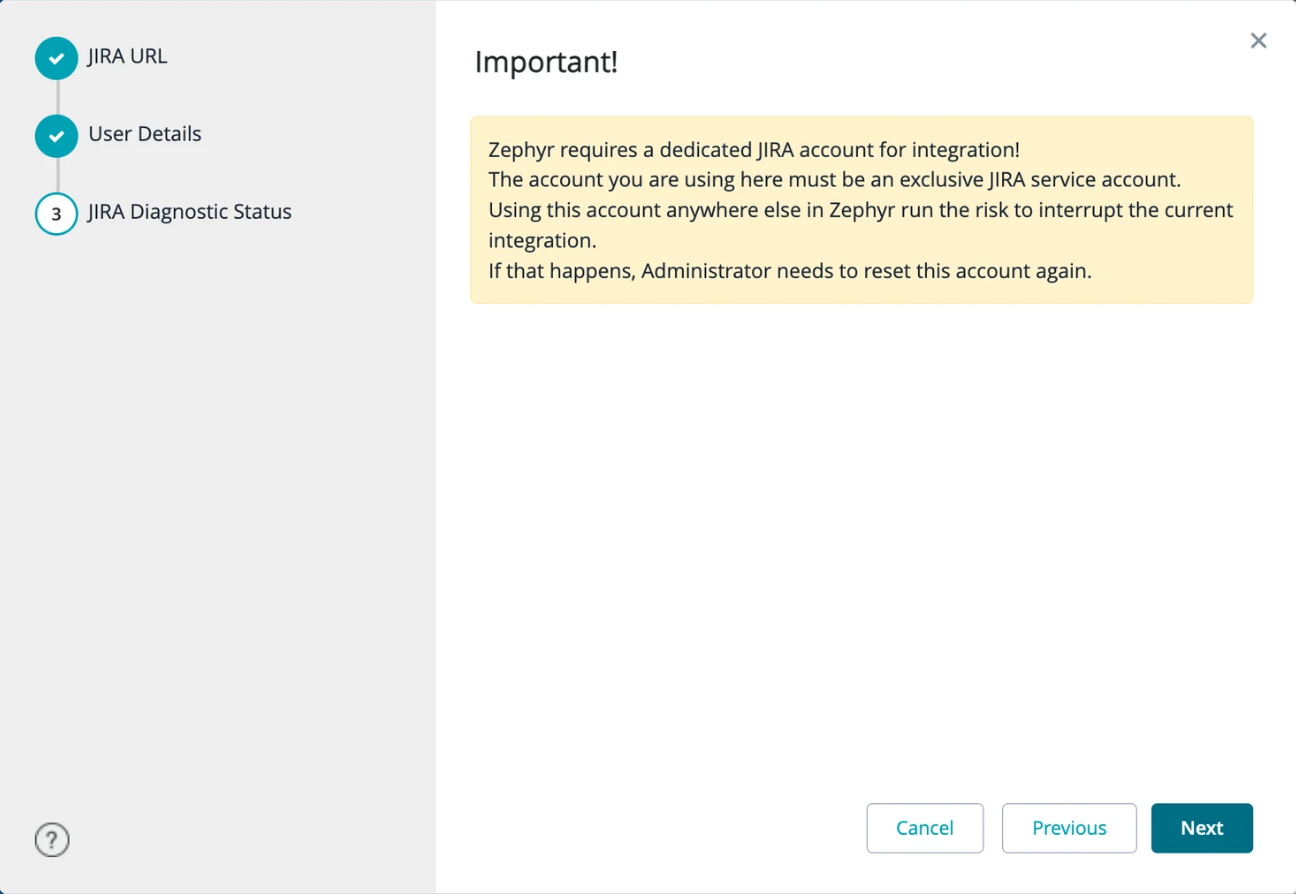
7. Zephyr will show the following dialog box:
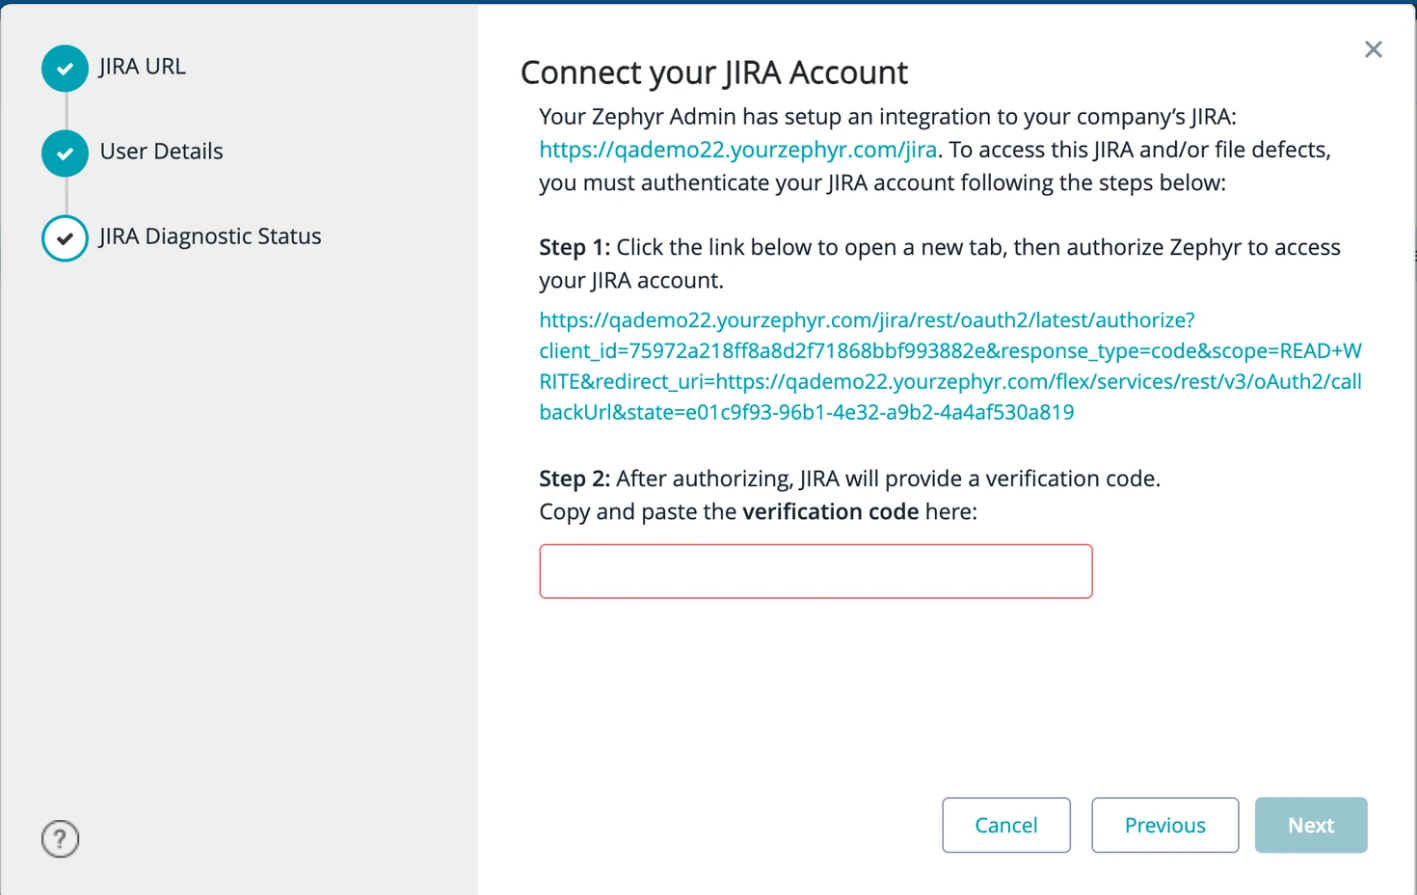
1. If you correctly specify the Client ID and Client Secret , you will see some valid authorization URLs. Otherwise, this value will contain the error message.
In the dialog:
a. Click the URL specified in Step 1.

b. This will send Jira a request for the authentication code. The latter will request your approval to allow Zephyr access to your Jira project.
Click Allow to continue.
c. Jira will show another page with the verification code.
Copy this code to the clipboard and then switch to Zephyr and paste it into the Step 2 box.
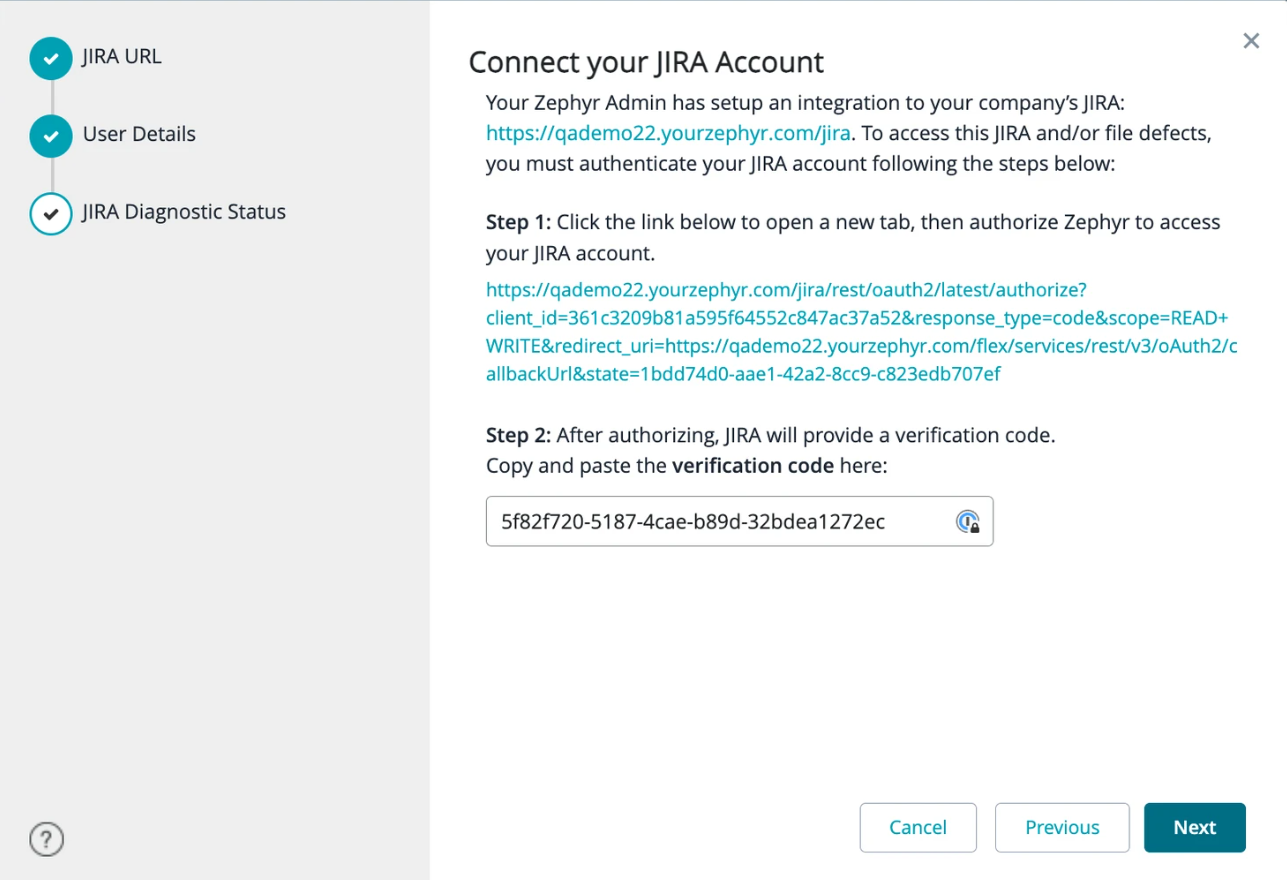
Click Next.
8. Zephyr will run some diagnostics and will report the results:
Click Done. You will see the newly created connection in the list of connections.
Notice
Switch the Create defects in Jira toggle on to allow issues to be created directly in Jira. If the toggle is on, clicking Next in Zephyr’s File New Defect dialog opens Jira’s Create error dialog in a new tab.
Warning
If the user is not logged in, the token will expire in 1 hour. The user must re-authenticate Jira by providing the new verification code.
Further steps
You have not yet completed the integration setup. To complete your Zephyr project, you must map it to a Jira project. Follow this link for details:
Note about webhooks
Webhooks are an essential part of Zephyr integration with Jira. They synchronize Zephyr and Jira requirements and information about defects.
Webhooks can be created in two ways:
Zephyr automatically creates a pre-configured webhook when mapping a project in Zephyr. In this case, there is no need to perform additional actions, but you need to have a Jira account with special permissions (for example, Browse Projects). You can view the created webhook in Jira settings: go to Settings > System (under Jira Settings) > Webhooks (under Advanced).
Warning
Don’t delete this webhook, and don’t change its properties. It has all the needed settings enabled. Later, you can update the webhook if necessary
You, as an administrator, can create and manage webhooks manually. This can be useful if you do not have (or do not want to make) a Jira service account with permissions required for automatic webhook management.
